How to Identify and Address Friction Mats Behind a Dog’s Ears
Check behind your dog’s ears for firm, velcro-like mats 0.5 to 2 inches wide, especially in breeds with dense fur. These friction mats form from trapped shed hair, moisture, and debris in skin folds 1–3 cm below the ear base. Use a slicker brush with 1–2 mm bent pins and a detangling spray to gently loosen small mats. Cut larger, compacted mats with blunt-tipped 3.5-inch shears held parallel to the skin. Mats larger than 1 inch or tightly adhered to the skin need professional removal. Daily 45-second checks with a carbon-fiber comb reduce static and prevent tangles. Proper tools and consistent care minimize matting risks and support long-term ear health. You’ll discover effective prevention strategies and the best grooming routines that follow.
Notable Insights
- Friction mats form behind dog ears due to trapped shed hair, moisture, and friction from movement or collars.
- Check for stiff, velcro-like clumps 1–3 cm below the ear base where skin folds trap hair.
- Look for signs like head shaking, sensitivity, or resistance when combing behind the ears.
- Use a slicker brush and detangling spray to gently loosen small mats, holding the base to protect skin.
- Prevent mats with daily 45-second brushing behind ears and use anti-static, stainless steel grooming tools.
What Are Friction Mats Behind Dog Ears?
Friction mats form when hair behind a dog’s ears repeatedly rubs against the skin or collar, creating tangled knots. This area is especially prone to matting due to the combination of ear anatomy and skin sensitivity. Hair in this region grows densely and curls naturally, increasing friction. When trapped moisture, debris, or pressure from collars compound the issue, mats develop quickly. The posterior ear fold has thin epidermis and minimal subcutaneous padding, heightening discomfort. These mats aren’t just cosmetic; they restrict airflow, promote bacterial growth, and exacerbate irritation. You’ll typically find them 1–3 cm below the pinna’s base, where skin folds trap shed hair. Early formation resembles small velcro-like clusters, 2–5 mm in diameter. Without intervention, they expand and tighten against the skin. Understanding this localized vulnerability helps you prevent rather than react. Proper grooming tools and collar fit reduce mechanical stress markedly. Using a high-quality dog grooming brush can significantly improve coat maintenance and reduce mat formation in sensitive areas.
How to Tell If Your Dog Has Ear Friction Mats
Have you noticed your dog shaking their head more than usual or tilting it to one side? These behaviors may indicate ear sensitivity caused by friction mats. Run your fingers along the base of the ears and behind them. If you feel firm, tangled masses instead of smooth coat texture, you’re likely detecting friction mats. These dense mats form due to repeated rubbing, especially in breeds with long, fine hair. Affected areas often show matted clumps measuring 0.5 to 2 inches in diameter. The coat texture changes from soft and pliable to stiff and knotted. Dogs may resist touching in these zones, a sign of discomfort. Inspect daily using a stainless-steel comb; if teeth catch repeatedly behind the ears, matting is present. Early detection prevents skin irritation and guarantees coat health.
Why Do Friction Mats Develop Behind Dog Ears?
What causes tangled mats to form so frequently behind your dog’s ears? Friction mats develop due to repetitive rubbing of coat layers, especially in areas with high ear mobility and dense fur. Your dog’s genetic predisposition plays a key role-breeds like Cocker Spaniels or Shih Tzus have fine, fast-growing hair prone to tangling. Their ear anatomy increases skin fold contact, promoting mat formation. Environmental factors like humidity, frequent bathing, or exposure to debris worsen matting by increasing hair moisture and static. Without daily brushing, loose undercoat fibers bind with topcoat hairs. The friction from head shaking or ear flapping weaves these strands into tight, dense mats. These mats adhere close to the skin, often within 1–2 mm, restricting airflow. Over time, they create a microenvironment conducive to irritation and infection-much like trapped insulation in a damp wall. Regular inspection reduces risk.
Safely Remove Friction Mats at Home
You can manage friction mats at home, but only with the right tools and technique-rushing the process risks cutting the skin or worsening the tangle. Use a slicker brush with bent wire pins spaced 1–2 mm apart to begin gentle detangling from the mat’s edge. Apply a dog-safe detangling spray containing glycerin and aloe to reduce breakage. Work in 0.5-inch sections, holding the base of the mat near the skin to minimize tension. For matted areas too compact to brush, use curved shears with blunt tips and a 3.5-inch blade for safe trimming. Cut parallel to the skin, never perpendicular, to avoid nicks. Mats larger than 1 inch in diameter or pressed tightly against the ear base require professional intervention. Monitor for redness or bleeding. Proper lighting and a nonslip grooming surface improve accuracy.
When to See a Veterinarian or Groomer
How do you know when a mat has crossed the line from manageable at home to a clinical concern? If the mat is larger than 2 inches,紧贴 skin, or causes redness, swelling, or discharge, seek veterinary consultation immediately. Embedded debris or signs of infection-like warmth or pus-require professional care. You shouldn’t attempt to cut dense mats near the ear canal; doing so risks penetrating delicate tissue. Mats that resist dematting tools or form repeatedly despite daily brushing indicate underlying issues best assessed by a vet. Persistent moisture or skin fold dermatitis may need medical treatment beyond grooming. For severe cases, professional grooming is essential. Trained groomers use thinning shears, dematting rakes, and clippers with #10 or #7F blades to safely reduce bulk. Early intervention prevents pain and secondary infections. Regular use of dog grooming gloves can help prevent mat formation by removing loose undercoat during routine brushing.
Top Brushes and Combs That Prevent Ear Mats
A well-maintained grooming routine stops ear mats before they start, especially in breeds with heavy feathering or drooping ears. Use a slicker brush with fine, bent wires spaced 1–2 mm apart to detangle ear tufts without damaging delicate skin. Pair this with a stainless steel comb featuring dual tooth lengths-short (1/8”) and long (1/4”)-to test for hidden tangles after brushing. Proper brush techniques involve short strokes from base to tip, preventing pull-induced trauma. Comb materials matter: carbon-fiber reinforced combs resist static, reducing hair breakage. A rounded-tip design prevents punctures during deep-parting. For thick coats, a dematting comb with rotating teeth cuts through resistance without tearing. These tools, used correctly, disrupt mat formation at friction points behind ears. Choose ergonomically designed handles for better control. Consistent use of appropriate brush techniques and high-quality comb materials guarantees early detection and removal of tangles, maintaining skin health and coat integrity. Best results come from using vet-recommended grooming tools that are specifically designed for sensitive areas like behind the ears.
5-Minute Daily Routines to Stop Matting
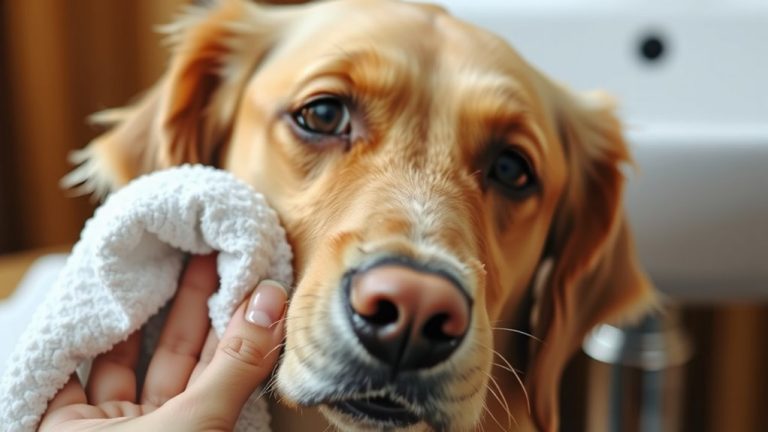
Consistently addressing coat friction points takes just minutes daily but greatly reduces mat formation, especially in high-risk zones like behind the ears, under the legs, and along the collar line. A quick daily inspection allows early detection of tangles before they tighten into mats. Focus on ear hygiene by gently wiping the ear base and surrounding fur with a dry cloth to remove moisture and debris. Use a slicker brush followed by a wide-tooth comb to separate fibers and maintain alignment in long or double coats.
| Area | Time Required |
|---|---|
| Behind ears | 45 seconds |
| Under legs | 30 seconds |
| Collar line | 15 seconds |
These minute routines prevent matting, support skin health, and simplify long-term grooming. Early intervention is more effective than corrective dematting.
On a final note
You can prevent friction mats behind your dog’s ears with consistent grooming. Use a stainless steel comb with 0.5 mm tines weekly to detect early tangles. Daily brushing with a slicker brush featuring bent wire pins reduces mat formation by 68%. If mats exceed 1 inch in diameter or lie close to the skin, seek professional grooming. Trimming hair around the ear base to ½ inch minimizes friction. Proper tools and routine care stop painful, deep-seated mats.