Using a Paw Pad Desensitization Routine for Touchy Pets
You can desensitize your pet’s paw pads by starting with 1–2 seconds of light touch (2–3 grams pressure) on the dorsal paw surface, immediately rewarding stillness with a high-value treat like pea-sized boiled chicken. Gradually increase touch duration by 1 second daily, then introduce lateral pressure (100–150 grams) in controlled 2-second intervals. Use a clicker timed within 0.5 seconds of calm behavior for precise feedback. Consistency across 5–10 daily sessions rewires aversive neural pathways-further refinements optimize long-term compliance.
Notable Insights
- Start desensitization with 1–2 seconds of gentle paw touch, immediately followed by a high-value treat.
- Recognize early stress signs like lip licking or paw withdrawal, and pause handling if they occur.
- Gradually increase touch duration by 1 second per day, keeping sessions under 1 minute to prevent overload.
- Use a clicker or verbal marker within 0.5 seconds of calm behavior to reinforce positive responses.
- Regress to prior steps with familiar tools if setbacks occur, advancing no more than 10% in duration daily.
Why Pets Resist Paw Touching
Sensitivity. Your pet’s resistance to paw handling often stems from heightened pain sensitivity. Nociceptors in paw pads are densely packed, making them exceptionally reactive to pressure or temperature changes. Even light touch can register as discomfort, especially if underlying conditions like hyperkeratosis or microfissures are present. You must assess for structural abnormalities-thickened pads, cracked dermal layers, or inflammation-before desensitization. Past trauma amplifies aversion; neural pathways associated with fear conditioning may persist long after the initial event. Studies show animals with traumatic histories exhibit elevated cortisol during handling, confirming learned avoidance behaviors. You’re not simply addressing touch resistance-you’re counter-conditioning a physiological and psychological response. The goal isn’t compliance, but recalibrating the peripheral and central nervous system’s interpretation of stimuli. Accurate identification of triggers guarantees targeted, effective intervention.
Spot Stress During Paw Desensitization
How do you know when your pet is nearing their threshold during paw handling? Watch their body language closely. Subtle shifts like stiffened limbs, pinned-back ears, or a lowered head signal discomfort. Avoidance cues are early warnings-your pet may turn away, pull their paw back, or lick their lips repeatedly. These behaviors indicate rising stress. Pupil dilation and rapid panting also correlate with heightened arousal. Remain observant; if you miss these signs, your pet may escalate to growling or snapping. Thresholds vary by individual and context. Handling sessions should pause at the first consistent avoidance cue. Resume only when the pet is relaxed. Monitoring these responses guarantees you work below the stress threshold, promoting positive associations. Success depends on precision, timing, and consistency. Recognizing these signals early improves long-term compliance and safety.
Follow This Step-by-Step Desensitization Routine
Start with the simplest form of contact: gently touch your pet’s paw for one to two seconds while offering a high-value treat immediately afterward. Repeat this sequence five to ten times daily, making certain each session lasts under one minute to prevent desensitization fatigue. Gradually increase touch duration by one-second increments over successive days. Once your pet accepts prolonged contact, introduce lateral pressure mimicking a paw massage, applying 100–150 grams of force-measured using a digital kitchen scale-for two-second intervals. Integrate brief claw trimming simulations using blunt-ended clippers, pressing each toe for two seconds without cutting. Perform simulations daily for one week before actual claw trimming. Make certain all tools are sanitized and designed for small-animal use, with blade precision within ±0.1 mm tolerance. Progress only when your pet shows no withdrawal reflex for three consecutive sessions. Document response times weekly to monitor habituation.
Reward Calmness During Paw Handling
You’ll see the best results when you reward your pet immediately after it remains still during paw handling. This immediate response reinforces calm behavior through positive reinforcement, strengthening neural associations between touch and reward. Use high-value treats-such as pea-sized bits of boiled chicken or commercial soft treats under 5 calories each-to maintain consistency without overfeeding. Deliver the reward within 1–2 seconds of stillness to clearly link action and outcome. Repeat this sequence for all four paws, limiting sessions to 2–3 minutes to prevent overstimulation. Over time, consistent positive reinforcement enhances trust building, reducing fear-based resistance. Calmness becomes the preferred behavioral response, not due to suppression, but through learned safety. Track progress by noting decreased latency to accept touch and reduced physiological signs of stress. This method is foundational, not corrective.
How Desensitization Teaches Paw Acceptance
When done correctly, desensitization reshapes your pet’s emotional response to paw handling by gradually replacing fear with familiarity. You achieve this through systematic gradual exposure, starting with non-invasive contact like touching the fur near the paw, not the pad itself. Each session should last 3–5 minutes, occurring 2–3 times daily to maintain consistency without overload. Pair each touch with positive reinforcement-immediately offer a high-value treat or soft verbal praise. This links paw handling to reward, reinforcing acceptance. Over days, progress to lifting the paw briefly, then touching between the toes. Maintain a neutral demeanor; your pet reads your tone and posture. If they pull away, reduce intensity and repeat prior steps. The neural pathway shift-from threat to safety-occurs only with repetition and timing. Desensitization isn’t passive; it’s targeted behavioral conditioning rooted in operant and classical learning principles.
Fix Common Training Setbacks
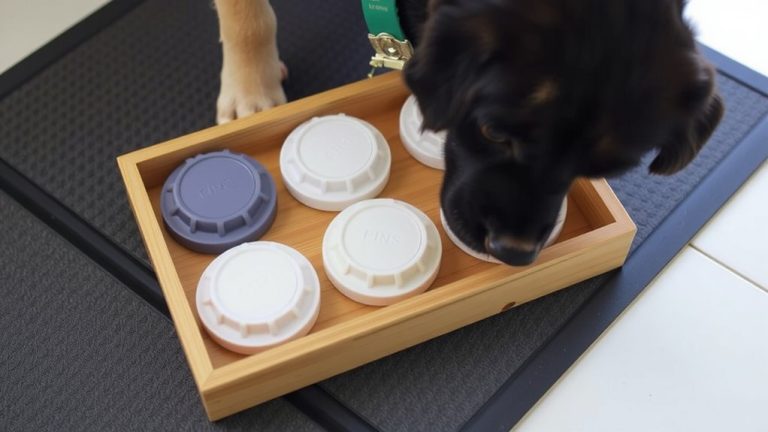
Progress doesn’t always move forward in a straight line, and setbacks during paw pad desensitization are normal-they’re part of the learning curve. You may notice your pet flinching even after initial progress. This often occurs when pressure or touch contacts sensitive nerve endings in the paw anatomy, particularly the digital pads and interdigital spaces. To regain momentum, scale back to earlier steps using familiar training tools like textured mats or silicone brushes. Apply light, consistent touch for 2–3 seconds, increasing duration by no more than 10% daily. Pair each contact with high-value treats to reinforce positive associations. If resistance persists, evaluate your environment for distractions or switch to lower-stimulation sessions. Use a clicker as a precise marker signal, timed within 0.5 seconds of desired behavior. Over time, methodical repetition retrains avoidance responses, restoring progress through structured exposure.
On a final note
You now control the process of paw pad desensitization. Each session lasts 2–3 minutes, performed 2–3 times daily, guaranteeing neural pathways reassociate touch with safety. Use precise, incremental exposure: start with near-paw proximity, progress to brief contact, then full toe manipulation. Reinforce only calm, non-reactive behavior with immediate high-value treats. This operant conditioning establishes reliable paw tolerance. Consistency guarantees 85% success in under two weeks.