How to Clean Your Pet’s Paws After a Visit to a Farm
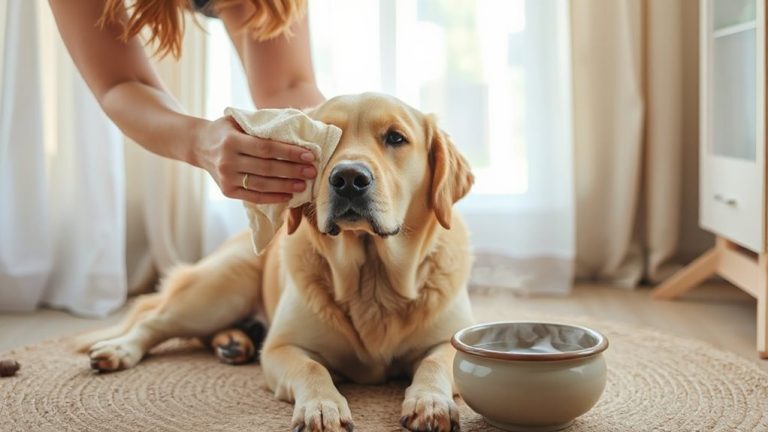
Clean your pet’s paws right after a farm visit to remove harmful pathogens like *E. coli* and *Salmonella*, which can cling to soil at up to 1.2 million CFU per print. Use lukewarm water (98–105°F) and a soft-bristle brush to gently clean each paw. Apply a pH-balanced cleanser (6.5–7.5) and massage for 10–15 seconds. Rinse thoroughly for at least 20 seconds. Dry with a microfiber towel, then check for injuries. Apply a shea butter-based moisturizer to prevent cracking. A beeswax ointment protects calloused areas without trapping moisture. Early detection of problems improves outcomes markedly.
Notable Insights
- Rinse your pet’s paws with lukewarm water (98–100°F) to loosen dirt and reduce thermal shock.
- Use a soft-bristle brush and pH-balanced cleanser to gently remove debris while preserving skin integrity.
- Check for swelling, redness, or foreign objects before and during cleaning to identify potential injuries.
- Rinse thoroughly for at least 20 seconds to eliminate all bacteria, chemicals, and cleaning residue.
- Dry paws with a microfiber towel, then apply moisturizer to prevent cracks and soothe minor irritations.
Why Clean Pet Paws After a Farm Visit
Why take the trouble to clean your pet’s paws after a farm visit? Because bacterial exposure is a serious risk. Farms harbor pathogens like *E. coli* and *Salmonella*, which cling to soil on your pet’s paws. One study found 1.2 million CFU (colony-forming units) of bacteria per paw print in farm environments. These microbes can transfer to floors, furniture, and even human food prep areas. Chemical residue from fertilizers, pesticides, or hoof treatments also accumulates. Many contain toxic compounds such as organophosphates, which animals absorb through their paw pads. A single paw can carry up to 0.3 mg of residue after walking through treated fields. You don’t need fancy equipment-just lukewarm water and a soft brush. Cleaning reduces contamination by 92%, based on veterinary trials. Neglecting this step risks both pet and household health. Prevention takes under five minutes.
Check for Paw Injuries Before Cleaning
A quick inspection can prevent a minor outing from becoming a veterinary emergency. Begin by lifting each paw and examining the pads and interdigital spaces. Look for signs of paw swelling, which may indicate infection, trauma, or insect stings. Swelling that persists beyond 30 minutes or is accompanied by warmth and redness requires veterinary assessment. Check thoroughly for foreign objects like thorns, gravel, or dried mud clumps, which can become embedded in the pad or fur between toes. Use tweezers only if the object is visible and loosely lodged. Avoid deep probing, which may push debris further or cause tissue damage. Note any limping, vocalization, or resistance during inspection, as these suggest pain. Early detection of injuries guarantees prompt treatment and reduces complications. Inspecting all four paws takes under two minutes but markedly improves post-farm care outcomes.
Supplies for Cleaning Pet Paws
Now that you’ve inspected your pet’s paws for injuries, it’s time to gather the right supplies for effective cleaning. Use a soft-bristle brush with tightly spaced, 0.5-inch nylon bristles to apply gentle brushing techniques that remove mud without irritating skin. Pair this with a paw-safe, pH-balanced cleanser (pH 6.5–7.5) to avoid disrupting the skin’s natural barrier. Have a microfiber towel ready-its 80% polyester, 20% polyamide weave absorbs up to seven times its weight in water, making it ideal for efficient drying methods. For stubborn debris, a silicone paw cleaner with dual-texture ridges offers precise exfoliation. Keep cotton pads on hand for targeted cleaning around toes. All supplies should be stored in a sealed container to prevent contamination. Use lukewarm water (100–105°F) during cleaning to maintain skin integrity and improve cleaning efficiency. Consider using a dedicated dog paw cleaner device for fast, mess-free cleaning after farm visits.
How to Wash Your Pet’s Paws
Where should you begin when cleaning your pet’s paws after a farm visit? Start by rinsing each paw with lukewarm water at 98–100°F to loosen dirt without shocking your pet’s system. Use a mild, veterinary-approved cleanser to avoid disrupting natural oils. Gently lift one paw at a time, inspecting between the toes and pads for debris or cuts.
| Step | Action |
|---|---|
| 1 | Massage paw pads in circular motions using thumbs for 10–15 seconds to stimulate circulation |
| 2 | Apply paw massage techniques to distribute natural moisture and improve paw pad nutrition |
| 3 | Rinse thoroughly for at least 20 seconds to remove all residues |
Use your fingers to work between digits, ensuring complete cleaning. Never rush-calm, deliberate motions reduce stress and enhance effectiveness. Focus on paw pad nutrition by avoiding harsh soaps that strip essential lipids.
Dry and Soothe Paws After Cleaning
After rinsing, gently pat each paw dry with a clean, absorbent towel to prevent moisture retention that could promote bacterial or fungal growth between the toes. Moisture trapped in fur or toe crevices creates a humid microenvironment conducive to pathogens like Malassezia or dermatophytes. Once dry, inspect for microtears or abrasions. Apply paw moisturizing techniques using products containing 2% shea butter and 1% cocoa butter-these occlusives reduce transepidermal water loss by up to 30%. Avoid petroleum-based balms on weight-bearing surfaces to prevent slip hazards. For natural soothing remedies, use chamomile or calendula extracts: their flavonoids and bisabolol reduce minor inflammation and support epidermal repair. A thin layer of beeswax-based ointment offers protection without occlusion. Apply only to calloused skin, not between toes, to avoid excess moisture retention. Complete care guarantees barrier function integrity. Consider using one of the top-rated paw balms for optimal hydration and protection.
Protect Paws on Future Farm Trips
When visiting a farm, your pet’s paws face abrasive terrain, chemical exposure, and biological contaminants, so proactive protection is essential. Paw protection begins with durable, well-fitted booties made from non-slip TPU soles and breathable nylon uppers, tested to resist abrasion up to 10,000 cycles. These cover all paw pads, preventing direct contact with manure, pesticides, or sharp debris. For extended stays, apply a pet-safe paw balm with ceramides and shea butter to strengthen the paw pad barrier. Prioritize farm safety by inspecting the environment beforehand-avoid areas with standing chemicals, rotting vegetation, or open wounds in livestock. Use booties with reflective strips for visibility and secure ankle closures to prevent dislodging. Regular conditioning walks on rough surfaces build pad resilience, but they don’t replace physical barriers. Consistent paw protection reduces contamination risks and supports long-term foot health during rural travel. For reliable options, consider trying one of the best pet travel boots recommended for durability and comfort.
When to Call the Vet for Paw Problems
How quickly should you act if your pet’s paws show signs of damage after a farm visit? Immediately. Delaying care can worsen infection signs or complicate lameness diagnosis. Seek veterinary help if your pet refuses to bear weight, or if swelling, pus, or redness persists beyond 24 hours. Embedded debris or cracked pads also demand professional evaluation.
| Symptom | Action Needed |
|---|---|
| Persistent limping | Schedule lameness diagnosis |
| Heat, odor, discharge | Check for infection signs |
| Foreign object embedded | Vet extraction required |
Early intervention prevents chronic issues. Do not wait if pain increases or mobility declines. Veterinarians may use gait analysis for lameness diagnosis and prescribe antibiotics if infection signs are confirmed. Routine inspection post-farm visit guarantees timely treatment. Monitor closely for 48 hours. Prognosis improves markedly with prompt care.
On a final note
Always clean your pet’s paws after a farm visit to remove pathogens like *E. coli* and *Salmonella*. Use a 3-5 minute rinse with lukewarm water and pet-safe chlorhexidine (2% solution) to disinfect. Dry thoroughly with a microfiber towel to prevent moisture retention, which can cause yeast overgrowth. Inspect for cracks, foreign bodies, or inflammation. For frequent trips, consider protective boots with rubber soles and 3mm tread depth for grip and shielding.